
Before any soldering or programming happens at all, I’ll need to have a general idea of what connects where.
This post presents the schematic for the Secret Santa Clock and a quick explanation of each “module” of the system. Everything from a bird’s-eye perspective that is enough for you to reproduce it.
Schematic
First things first, the schematic of the system.

Created with xcircuit. I may write a post about it in the near future
Component list
- 500 Ohm resistors. x3
- Pushbuttons. x3
- Arduino Nano. x1
- Tiny RTC. x1
- Max7219 led matrix. x4
- 5pin connector. x1
Buttons
The buttons are active-high with a pull down resistor. When the button is unpressed (open) there is no connection from the MCU (µController unit) to V+, so the Arduino pin reads low (connects directly to ground).
Once you press the button, the pin connects to V+, value 1 for Arduino.
There are 3 buttons to drive, that means 3 pins on the Arduino.
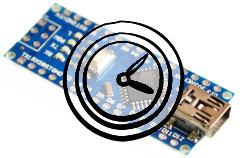
RTC
The RTC we use is the Tiny RTC. This module has various pins with different functionality, but I’ll just connect it to get the calendar data. The RTC sends the information via I2C protocol, and for this, the nano has two analog pins (A5, and A6).

arduino Nano I2C pins
Just wire the 4 pins accordingly:
VIN– Voltage InGND– GroundSDA– Serial Data LineSCL– Serial Clock Line
MAX7219 led Matrices
The 4 led matrices are daisy chained together. The only thing to take into account is that the Dout of Matrix 0 has to be connected to Din of Matrix 1, Matrix 2 to Matrix 3 etc.. The following daisy chain schematic is extracted directly from the MAX7219 datasheet. For the clock it’s exacly the same but with 4 MAX7219 drivers.

MAX daisy chained
The module that I have has the led matrix and the MAX7219 already wired, leaving only the VIN,GND,DIN,CS,CLK pins exposed. Since this may be positioned in a different board than the clock, I will wire this pins to a connector (this is not represented in the schematic since it’s more a build decision).
VIN– Voltage InGND– GroundDIN– Data InCS– Chip SelectCLK– Clock
Arduino has SPI support with D10,D11,D12 pins : MOSI (Master Output Slave Input) , MISO (Master Input Slave Output) and SS (Slave Select)

Arduino Nano SPI
Concluding
As you can see the system is quite simple, there is not a lot of wiring to be done and the tidyness of it will only depend on your soldering ability. (Mine is low, so it will probably become a mess :-D)
References
MAX7219-MAX7221 datasheet ⇒GO
Arduino Nano website ⇒GO
DS1307 RTC datasheet ⇒GO

Can you provide the coding you used for this? Using your schematic for my own DIY clock!
Hello!
I never got around to add a post with the full code since it was in an old hard drive that kind of died and I got caught up in different things 😦
But today seeing your comment I’ve dug it up.
I may (or may not) write a post explaining the whole process, so at least the project is fully explained. But for now you can get the code from my github:
https://github.com/kxtells/Arduino
You’ll see that is rough in some parts and that it has calendar functionality. Feel free to ask anything about it :-D. Drop me an email.
Thanks a lot!! Really appreciate it.